Reporting System Installation
Installation Steps
The high-level steps for installing and configuring N2ACD reporting node is:
- Determine the server(s) that will supply the processing node for reporting, bearing in mind the supported operating systems and minimum server requirements.
- Install the NiFi and (optionally) Superset as documented on this page.
- Install and configure MiNiFi on service nodes.
OS-Specific Setup
Refer to the specific Red Hat or Debian instructions for any pre-requisites as required. Note that the EPEL repository is required for the reporting server and so the EPEL release package must be installed.
Apache NiFi Installation
The ACD reporting data pipeline is built on Apache NiFi and consists of three core data processing functions:
- The export of the ACD primary database into timestamped point-in-time snapshots of data in the reporting database.
- The copy of EDR files from service nodes to the reporting node for future processing.
- The stream processing of ACD EDRs to extract freephone call activities, storing aggregate information in the reporting database.
Apache NiFi is distributed by the Apache Foundation as .zip files. N-Squared provides an
wrapper RPM to install NiFi based on these source files. Configuration suitable for a N2ACD deployment is also
automatically included.
Install Apache NiFi from the N-Squared repository. Execute the instructions specific to your operating system:
| RHEL 8 | RHEL 9 | Other RPM-based Systems |
|---|---|---|
sudo dnf install n2nifi-wrapper |
sudo dnf install n2nifi-wrapper |
sudo yum install n2nifi-wrapper |
Warning: The package installation will shut down Apache NiFi if it is running. It will require manually restarting.
The Apache NiFi installation using the wrapper package will:
- On RHEL8 and RHEL9, install Apache NiFi in a version-specific subdirectory of
/opt/nifi. - On RHEL9 install the Apache NiFi Registry in a version-specific subdirectory of
/opt/nifi/registry. - Create links to
/opt/nifi/latestand/opt/nifi/registry/latestas appropriate, installing the default N-Squared configuration if the installation is to a new server. - Configure NiFi (and the Registry if installed) for execution via systemd. The NiFi service is
nifiand the NiFi Registry isnifi-registry. - Configure Apache httpd to reverse proxy access to the frontend GUIs.
- Configure a default EDR file management location
/opt/nifi/edr.
Apache NiFi Configuration
Apache NiFi’s configuration must be set up with the correct hostname in the nifi.properties file.
This is (at minimum) required for NiFi to correctly work via the Apache httpd reverse proxy frontend.
Note that MiNiFi data transfer can work via the httpd reverse proxy, or if using RAW transfer,
the hostnam in nifi.properties must be accessible to MiNiFi endpoints.
The base configuration distributed with NiFi is designed to support data transfer of EDRs over the NiFi RAW protocol on port 1026 between service nodes and the reporting server. NiFi itself is set up to use HTTP, and be behind the Apache httpd reverse proxy configuration.
After NiFi has been installed, edit /opt/nifi/latest/conf/nifi.properties, and locate the following section:
# Site to Site properties
nifi.remote.input.host=nifi-host-if.example.com
nifi.remote.input.secure=false
nifi.remote.input.socket.port=1026
nifi.remote.input.http.enabled=true
nifi.remote.input.http.transaction.ttl=30 sec
nifi.remote.contents.cache.expiration=30 secs

# Basic HTTP web properties
nifi.web.http.host=web-host-if.example.com
nifi.web.http.port=8080
nifi.web.http.network.interface.lo=lo

# Basic HTTPS web properties
nifi.web.https.host=
nifi.web.https.port=
nifi.web.https.network.interface.lo=lo
Note that nifi-host-if.example.com and web-host-if.example.com refer to domain names of the same server.
The hosts may be the same domain name, or different. They may use the same IP address or be different.
The following configuration options need to be configured as appropriate:
| Configuration Option | Purpose | Value |
|---|---|---|
nifi.remote.input.host |
The hostname that service nodes (using MiNiFi) will use to connect to NiFi for data transfer. A HTTP reverse proxy can be used to not use this directly when HTTP transport is used, but if RAW transport is used this must be accessible and usable directly by MiNiFi. | environment specific |
nifi.remote.input.port |
The port used when using RAW communication between MiNiFi and NiFi. Use the default 1026 unless there is reason to change. Can be left configured even if RAW communication is not being used. | 1026 |
nifi.web.http.host |
The hostname that web clients (and MiNiFi) will use when contacting the NiFI REST API. | environment specific |
nifi.web.http.port |
The HTTP port that the NiFi web interface will use to listen on. This should be the port used (a) by MiNiFi for connectivity when it needs to connect to NiFi directly, and (b) the port that the apache reverse proxy (installed also on the reporting server) will proxy requests for the NiFi GUI too. Note that this port can be changed from HTTP to HTTPS later. | 8080 |
nifi.web.https.network.interface.lo |
The network interface that NiFi will listen on for it’s HTTP GUI. This is set to lo in the installed N2ACD default config as Apache httpd is used as a reverse proxy, restricting it to internal traffic only. |
lo |
All other configuration options can be initially left as the shipped defaults. Note that this configuration supports either RAW or HTTP based EDR transfer. When using RAW transfer port 1026 must be open for connectivity from service nodes. If using HTTP transfer, port 1026 will not be used and the standard HTTP(S) port is all that will be necessary.
Apache NiFi Registry Configuration
This section only applies to RHEL9 installations with Apache NiFi v2 or greater installed.
The NiFi Registry configuration is stored in the directory /opt/nifi/registry/latest/conf/.
Unlike NiFi itself, the default configuration installed by the n2nifi-wrapper package
is sufficient and requires no changes for N2ACD deployments.
Firewall Access
For RAW EDR transfer, add port 1026 to the firewall’s list of open ports.
firewall-cmd --add-port=1026/tcp --permanent
firewall-cmd --reload
Apache NiFi is configured through it’s GUI design tool, a web-based stream processing GUI with a visual design tool used for both building and monitoring the stream processing engine.
Access is proxied via HTTP in the default configuration, and HTTPS once secured. Ensure that the firewall ports are opened. Firstly for HTTP and HTTPS:
firewall-cmd --add-port=80/tcp --permanent
firewall-cmd --add-port=443/tcp --permanent
firewall-cmd --reload
If direct HTTP access to NiFi is planned, then the port NiFi is listening on (port 8080 in the default configuration) must also be made available:
firewall-cmd --add-port=8080/tcp --permanent
firewall-cmd --reload
Enabling Apache Nifi and NiFi Registry
Enable the Apache NiFi service, and start it for the first time:
systemctl enable --now nifi
On RHEL9 systems with NiFi v2 installed, also enable and start the associated Registry:
systemctl enable --now nifi-registry
First Post-Startup Actions
After first startup, check that NiFi has completed setup correctly.
-
NiFi secure passwords are generated and stored back into the
nifi.propertiesfile by NiFi after first startup. The parameternifi.sensitive.props.keyis updated.Copy the password stored in this field and ensure the password is saved securely.
Note that if this parameter is not updated with a password, then the likely problem is that the file is not owned by
n2in(the user that runs NiFi) -
Capture the NiFi default username and password. This can be retrieved by running the command
grep -i 'Generated ' /opt/nifi/latest/logs/nifi-app*. The username and password for the admin user can be reset using the command:/opt/nifi/latest/bin/nifi.sh set-single-user-credentials <username> <password>However note that by default the N2ACD apache NiFi installation is configured without authentication enabled on first install.
The NiFi configuration can be backed up by storing the flow.json.gz files
that are stored in the /opt/nifi/data/conf directory. Note that NiFi itself backs up
files to the /opt/nifi/data/conf/archive directory.
Apache Superset
Apache Superset is only aveailable for RHEL8 systems
Apache Superset is a data visualisation platform for creating dashboards and generating and downloading tabular data. With Superset, N2ACD reporting data can be accessed.
Note that reports available to N2ACD users via the N2ACD GUI are built from reporting data directly from the database, and not from the Apache Superset.
Apache Superset is distributes as a Python package and requires pip for installation, which
in turn requires a general internet connection. N-Squared provides a prepackaged distribution of
Apache Superset so that a general internet connection is not required.
Install Apache Superset from the N-Squared repository. Execute the instructions specific to your operating system:
| RHEL 8 | Other RPM-based Systems |
|---|---|
sudo dnf install n2superset-wrapper |
sudo yum install n2superset-wrapper |
Warning: The package installation will shut down Apache Superset if it is running. It will require manually restarting.
The Apache Superset installation using the wrapper package will:
- Install a pre-build Python virtual environment in
/opt/superset/that includes Apache Superset and all necessary python dependencies. - Configure Apache Superset for execution via systemd as the service
superset. - Configure the Apache HTTP server to proxy access to Apache Superset via port 80.
After the first installation of Superset it is important to create the administration account and initialise the Superset database. On the installed server, execute the following commands, starting as the root user:
su - n2in
cd /opt/superset && . venv/bin/activate
export FLASK_APP=superset
superset fab create-admin
superset init
Once this is done the first time, the normal systemctl service can be used to manage the running superset instance.
Starting Superset
After verifying the configuration of Apache Superset, start the service as root:
systemctl start superset
Post-Installation Steps
HTTP(S) Reverse Proxy Configuration
Apache httpd is used as a reverse proxy to support HTTP(S) access and provide a frontend to the different web interfaces run on the reporting server.
Proxy configuration installed into /etc/httpd/conf.d/nifi.conf
by the n2nifi-wrapper package. The default configuration of this file is
sufficient for HTTP access with the default nifi.properties configuration.
Enable/restart Apache httpd:
sysetmctl enable --now httpd
systemctl restart httpd
To access the GUI services, access the host, and use the displayed page to select one of the available services.
GUI Access
EDR Streaming
ACD EDRs are expected to be streamed from service nodes to the reporting platform. N2ACD provides a pre-built MiNiFi configuration for EDR streaming, however EDRs can be loaded on to the platform in any practical manner.
EDRs for processing can be placed in any directory, however the default configured directory is /opt/nifi/edr/received.
EDRs are moved from this directory to opt/nifi/edr/input by a daemon process
called moveAndCopyOnWriteComplete which monitors for new EDR files and moves
them between the received and input directory. The
moveAndCopyOnWriteComplete daemon is installed as a systemd service by the
n2nifi-wrapper package installation. The service script
/usr/lib/systemd/system/moveAndCopyOnWriteComplete.service itself determines
the source and destination directories, and file suffix to monitor.
To change the configuration if this is not using the right EDR directories, edit the installed file and then reload the systemd configuration:
systemctl edit moveAndCopyOnWriteComplete.service --full
Only files ending in .edr are moved between these directories. Note that the default configuration:
/opt/nifi/install/bin/moveAndCopyOnWriteComplete.sh '^[^.].*\.edr' /opt/nifi/edr/received /opt/nifi/edr/input /opt/nifi/edr/backup
Excludes files starting with a dot. This is crucial to avoid in-progress written files which are being written by the NiFi process that is receiving files from service nodes.
It is also important, if you want to back up files received and not have them processed without
backups (because NiFi reads then deletes files), to configure moveAndCopyOnWriteComplete to use
the backup directory. The command should be changed to:
/opt/nifi/install/bin/moveAndCopyOnWriteComplete.sh '^[^.].*\.edr' /opt/nifi/edr/received /opt/nifi/edr/input /opt/nifi/edr/backup
This script must also be enabled. Ensure it is run on startup:
systemctl enable moveAndCopyOnWriteComplete.service
systemctl start moveAndCopyOnWriteComplete.service
File Monitoring
ACD EDRs are moved and processed through directories in /opt/nifi/edr automatically by
Apache NiFi and moveAndCopyOnWriteComplete. This process will be automated and extremely performant in
general.
A daemon process called monitorAndAuditFileChanges is installed as part of
the n2nifi-wrapper package. This daemon process monitors changes to files in
directories under /opt/nifi/edr and writes a log of all file changes to
/var/log/nifi/monitorAndAuditFileChanges.log
For viewing how files are being processed by the reporting system, tail this file:
tail -f /var/log/nifi/monitorAndAuditFileChanges.log
This log file is further managed by the Linux logrotate daemon. To configure this script to monitor all the correct directories, edit and change if required:
systemctl edit monitorAndAuditFileChanges.service --full
This script must also be enabled. Ensure it is run on startup:
systemctl enable monitorAndAuditFileChanges.service
systemctl start monitorAndAuditFileChanges.service
Initial NiFi Template Upload
The approach required for the initial NiFi template upload will depend on the version of NiFi installed.
Initial NiFi Template Upload (NiFi v1.x)
This section only applies to RHEL8 installations with Apache NiFi v1 installed.
Templates for process groups used in the ACD EDR file transfer should be imported direct into NiFi.
The following templates should be imported into NiFi from N-Squared:
MiNiFi_File_Push.xmlMiNiFi_File_Receive.xmlN2SVCD_EDR_Parsing.xmlRead_EDR_Files,_Compress,_Pass_On.xmlStore_to_DB.xml
To import:
- Load the NiFi editor (e.g. http://web-host-if.example.com/nifi/).
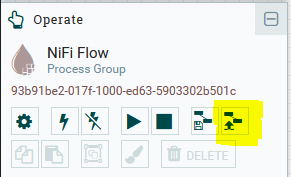
- Using the small “Upload Template” icon from the overall “NiFi Flow” process group, open the template upload dialog.
- Select from the file menu each process group template being imported in turn. These are provided by N-Squared over email.
- After the template has been uploaded, Drag the “template” node to the canvas, selecting the uploaded template you want to create as a new process group. For each template other than
MiNiFi_File_Push.xml, create process groups from the templates. - Make changes to the templates as required.
Initial NiFi Registry Configuration (NiFi v2.x)
This section only applies to RHEL9 installations with Apache NiFi v2 or greater installed.
Configure N-Squared Bucket
The NiFi Registry holds version-controlled process groups (i.e. Flows) to be used in the local NiFi
deployment. All flows are stored in buckets. Create first a N-Squared bucket.
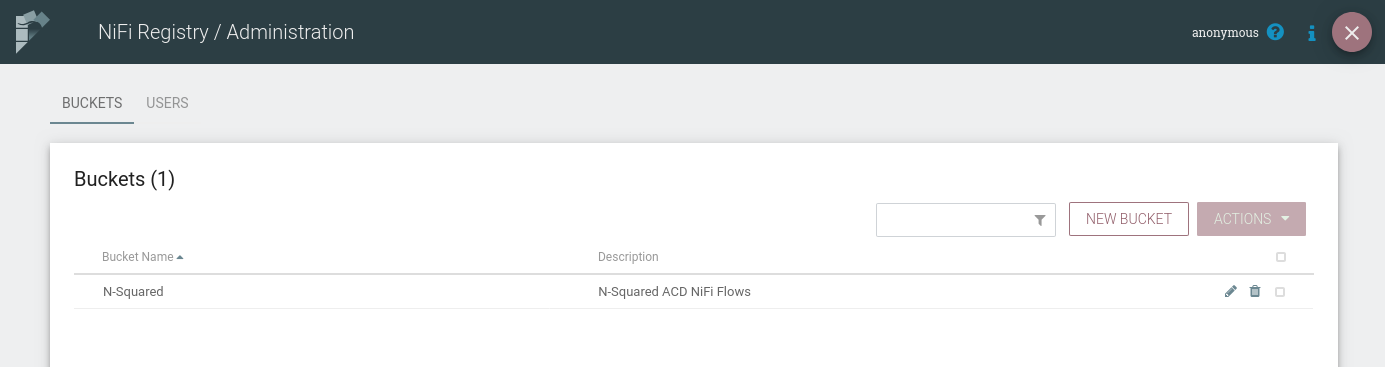
Access the registry from the URL of the reporting server (e.g. http://web-host-if.example.com/registry/nifi-registry/) and access the settings menu available from the top-right wrench icon:
On the settings page, create a N-Squared bucket:
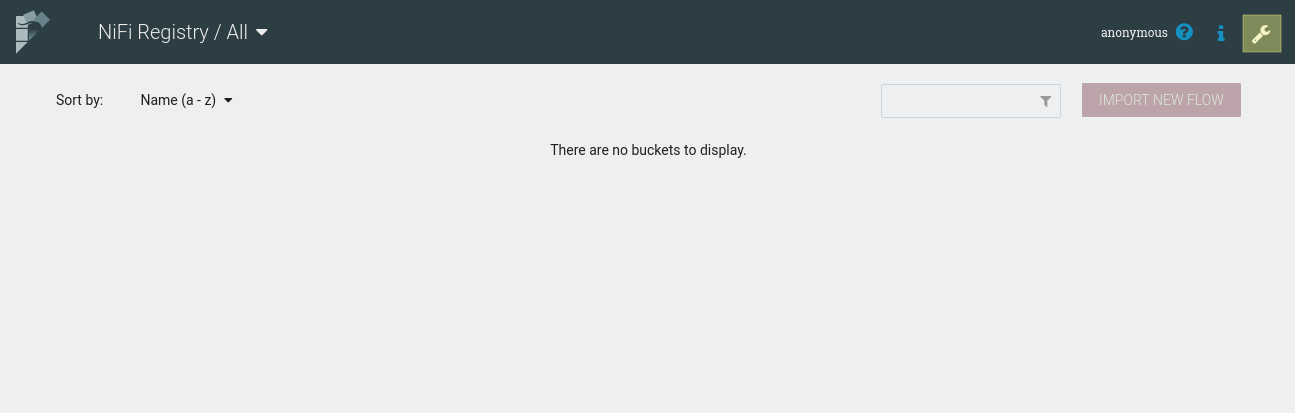
Once created, return to the main screen of the registry and use the Import New Flow button
to import the following NiFi flows from N-Squared:
MiNiFi_File_Push.jsonMiNiFi_File_Receive.jsonN2SVCD_EDR_Parsing.jsonRead_EDR_Files,_Compress,_Pass_On.jsonRead_EDR_Files,_Compress,_Pass_On Wait Schedule.jsonRead_EDR_Files,_Compress,_Store.jsonStore_to_DB.json
Import each into the N-Squared bucket. The resulting list of flows will appear similar to the following:
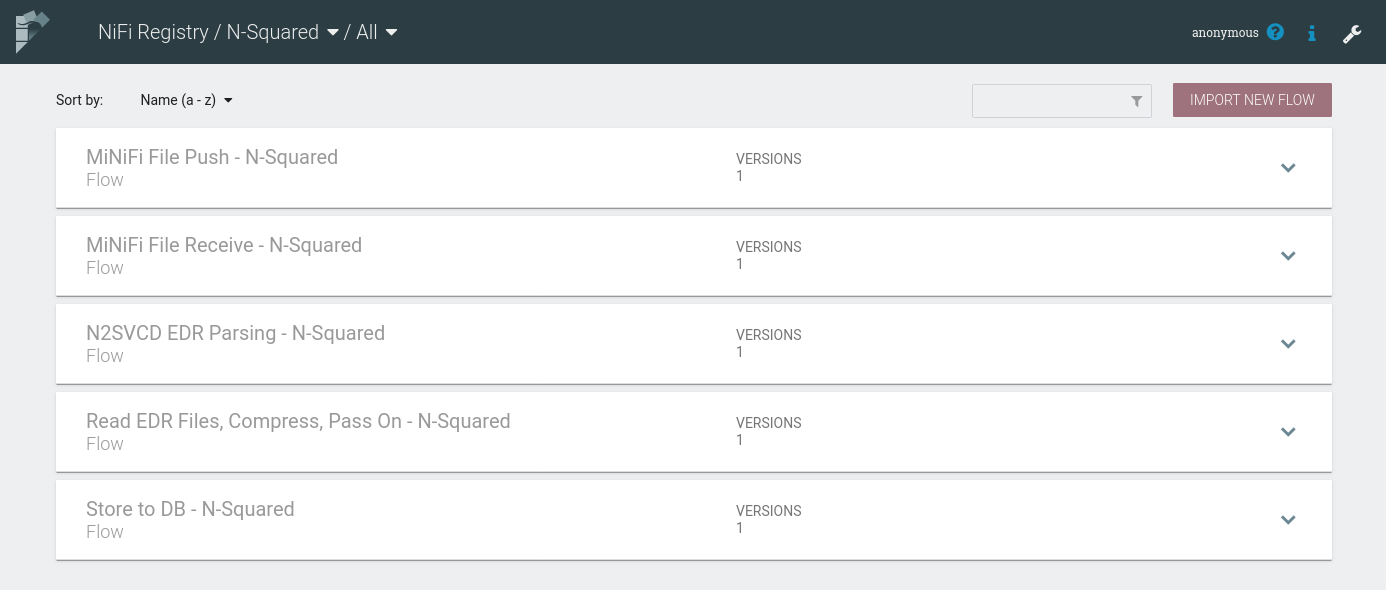
These imported flows will be used to configure MiNiFi EDR processing
NiFi Registry Client Configuration
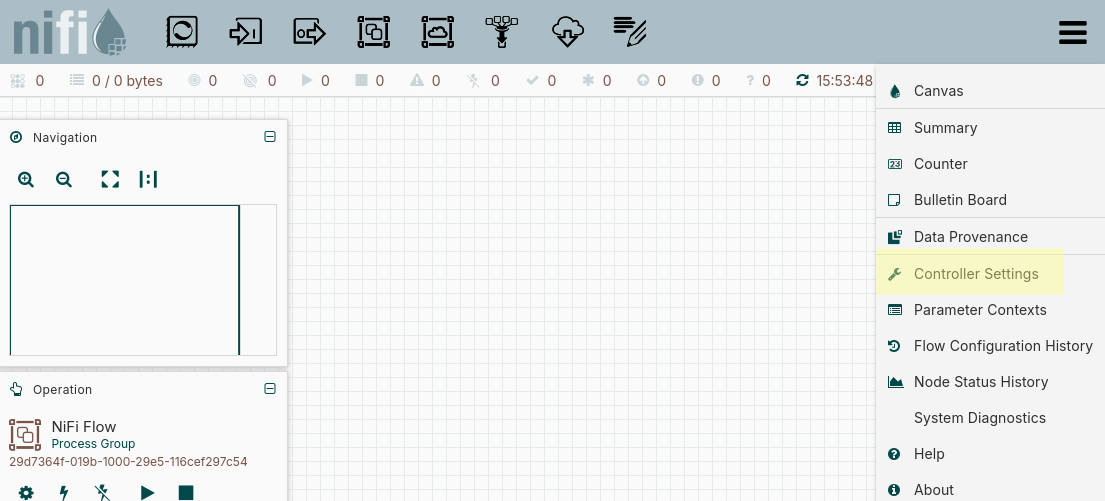
The NiFi installation must also be configured to connect to the registry. Access NiFi from the URL of the reporting server (e.g. http://web-host-if.example.com/nifi/) and access the global controller settings from the burger bar menu:
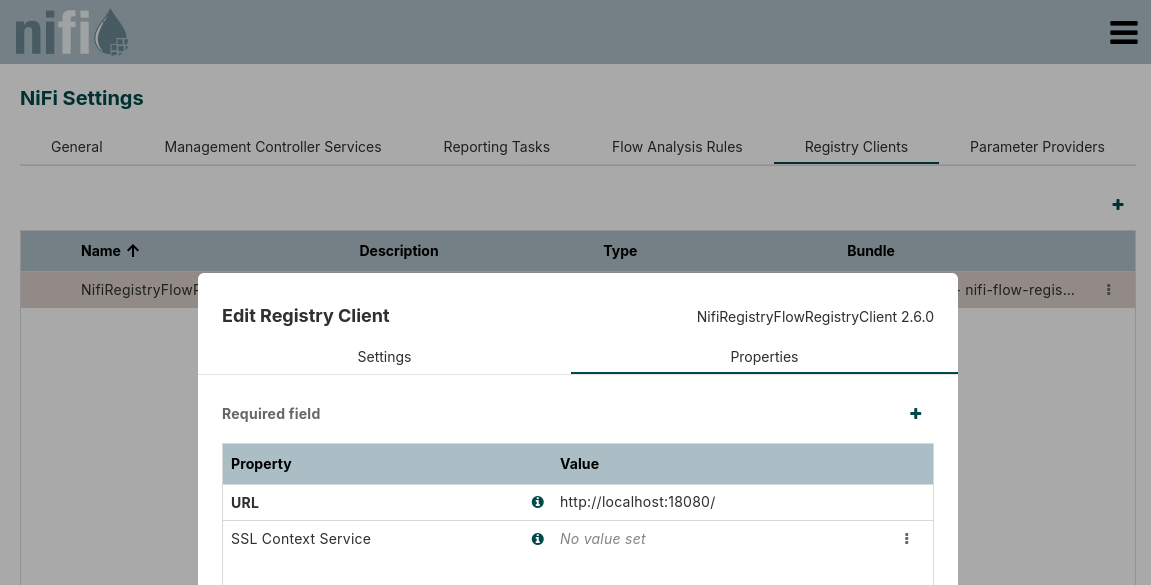
From the controller settings page, on the Registry Clients tab create a new registry client using the
NifiRegistryFlowRegistryClient. The client configuration should be set to use the URL http://localhost:18080
unless the registry has been reconfigured to use a different port:
Once configured the registry will be available and flows will be able to be imported into NiFli
from it direct to the canvas. Process groups for all uploaded templates other than MiNiFi File Push should be created.
Securing NiFi
Securing NiFi requires firstly the generation of an (intermediate) CA certificate for NiFi to use to self-generate server certificates and to verify client certificates. The following guide is only one approach to this configuration, however other configurations (e.g. using a separate CA and providing an intermediate CA for NiFi to use) are out of scope of this guide.
This section of the ACD installation guide documents how to:
- Generate a self signed CA for NiFi to use for communication between NiFi and MiNiFi instances.
- Generate client certificates for MiNiFi to use when communicating with NiFi
- Configure NiFi to accept MiNiFi connections without passphrases where a client certificate is available.
- Configure NiFi for user access via the installed Apache HTTPD proxy over HTTPS with (a) an organisation-provided certificate (i.e. not self-signed) with username/password security.
For additional information on NiFI configuration, particularly security configuration, see the NiFi documentation.
TLS Certificate Framework Generation
NiFi provide a TLS certificate generation tool called tls-toolkit.sh.
Download the NiFi toolkit and
unzip the downloaded package into a Windows or Linux based environment
with Java.
Run the tls-toolkit.sh (or .bat) command. For the linux .sh script:
cd nifi-toolkit-2.7.2/bin
export NIFIHOST=web-host-if.example.com
mkdir $NIFIHOST
./tls-toolkit.sh standalone -d 7300 -n "$NIFIHOST" -C "CN=minifi, OU=NIFI" -o $NIFIHOST
Where:
-d 7300is 20 years. Set this as required based on certificate cycling requirements of the organisation, and expected certificate renewal support processes.-n $NIFIHOSTis a comma-separated set of hostnames that NiFi will be reachable on.-C "CN=minifi, OU=NIFI"is the distinguished name (DN) to use in the client certificate for MiNiFi. If multiple MiNiFi clients are being configured, and each requires a unique client certificate, the-Coption can be specified multiple times. It is possible to configure a client certificate for the Apache http reverse host as well using this method (giving it a DN different to the MiNiFi DN).-o $NIFIHOSTis the output directory to generate files to. This can be any directory name.
Note that the toolkit version will likely be different to the example above.
Ensure that the NIFIHOST environment is correctly defined for the hostname of
NiFi for the environment being installed.
The TSL files will be generated into the directory $NIFIHOST. These will be
installed into /opt/nifi/data/ssl on the NiFi processing server.
Note that tls-toolkit.sh has many options which can be used in more complex
scenarios - such as multiple client certificates, multiple hostnames (requiring
subject alternate name configuration). Additionally, underlying tools
can be used to generate the files directly.
Using tls-toolkit.sh, the following files will be created:
| File | Purpose |
|---|---|
nifi-cert.pem |
The certificate of the Certificate Authority. This can be used by clients to verify connections to NiFi are valid. |
nifi-cert.key |
The private key of the Certificate Authority. |
CN=minifi_OU=NIFI.p12 |
The file holding the client certificate for MiNiFi. Note that each -C added to the command line generates a separate file. |
CN=minifi_OU=NIFI.password |
The password to decrypt the client certificate file of the same name. |
truststore.jks |
The truststore file holds the nifi-cert.pem file as a trusted CA certificate. |
keystore.jks |
The keystore file holds the nifi-cert.key file as the key. |
nifi-properties |
The default nifi.properties file distributed with NiFi, with secure Nifi configuration set up. The relevant values from this file are the nifi.security.keystorePasswd, nifi.security.keyPasswd, and nifi.security.truststorePasswd fields which must be copied into the active NiFI configuration. |
Note that NiFi does not generate an explicit server certificate for NiFi. This is done internally by NiFi as required based on the CA.
Extract and Install Files into MiNiFi
Note that if MiNiFi is not yet installed on service nodes, follow the MiNiFi installation guide first, and then return to this section for completing the secure configuration.
Secure NiFi – MiNiFi connectivity requires a client certificate for MiNiFi that
has been generated based on the NiFi CA. This is done when the tls-toolkit.sh
script is used as described above.
Assuming tls-toolkit.sh has been run as above, generate the files for MiNiFi:
openssl pkcs12 -legacy -in $NIFIHOST/CN=minifi_OU=NIFI.p12 -out $NIFIHOST/nifi-rest.key -nocerts -nodes
openssl pkcs12 -legacy -in $NIFIHOST/CN=minifi_OU=NIFI.p12 -out $NIFIHOST/nifi-rest.crt -clcerts -nokeys
The -legacy option must be given when using modern openssl versions due to the
format of the p12 file that the tls-toolkit creates.
When extracting the
This generates the two files for MiNiFi - nifi-rest.key and nifi-rest.crt.
A third file (generated by tls-toolkit.sh) - nifi-cert.pem is also required.
Once the client certificates are generated, copy these files to the service nodes, and place in a secure directory. E.g:
scp -p nifi-rest.key nifi-rest.crt nifi-cert.pem root@minifi-host:/opt/minifi/conf/ssl
Assuming /opt/minifi/conf/ssl exist. If it does not, create it on each
service node and make sure it is only readable by root:
mkdir -p /opt/minifi/conf/ssl
chmod 700 /opt/minifi/conf/ssl
For each MiNiFi instance, edit the /opt/minifi/conf/minifi.properties file and configure
the following configuration options:
nifi.remote.input.secure=true
nifi.security.need.ClientAuth=true
nifi.security.client.certificate=/opt/minifi/conf/ssl/nifi-rest.crt
nifi.security.client.private.key=/opt/minifi/conf/ssl/nifi-rest.key
nifi.security.client.pass.phrase=
nifi.security.client.ca.certificate=/opt/minifi/conf/ssl/nifi-cert.pem
Note that the passphrase is empty as the passphrase is stripped when using
openssl to extract the private key.
When ready to do so (i.e. once NiFi is configured - see below), restart MiNiFi
using systemctl restart minifi.
Install Files to NiFi
Install the generated TLS files into the NiFi server. On the reporting system, create the holding directory:
mkdir -p /opt/nifi/data/ssl/
Copy the generated files from tls-toolkit.sh to this directory. On the system
that generated the files:
scp -p -r $HOSTNAME/* root@nifi-host:/opt/nifi/data/ssl/
Then back on the Nifi server, secure the files copied in:
chown -R n2in:daemon /opt/nifi/data/ssl/
Once the TLS files are available, configure NiFi to use them. Editing nifi.properties,
update the configuration options as the following diff shows:
133c133
< nifi.remote.input.secure=false
---
> nifi.remote.input.secure=true
146,147c146,147
< nifi.web.http.host=web-host-if.example.com
< nifi.web.http.port=8080
---
> nifi.web.http.host=
> nifi.web.http.port=
152,153c152,153
< nifi.web.https.host=
< nifi.web.https.port=
---
> nifi.web.https.host=web-host-if.example.com
> nifi.web.https.port=8443
201a202,208
> nifi.security.keystore=/opt/nifi/data/ssl/web-host-if.example.com/keystore.jks
> nifi.security.keystoreType=jks
> nifi.security.keystorePasswd=1P3VEBITy/ha2gkf1a7xIxqL/RDaw61Mp/Qsyl1B6p8
> nifi.security.keyPasswd=1P3VEBITy/ha2gkf1a7xIxqL/RDaw61Mp/Qsyl1B6p8
> nifi.security.truststore=/opt/nifi/data/ssl/web-host-if.example.com/truststore.jks
> nifi.security.truststoreType=jks
> nifi.security.truststorePasswd=4q4HxdI9nhiKdHX5I1g8/jPuibNnnC812ohW2GySNbA
271c278
< nifi.cluster.protocol.is.secure=false
---
> nifi.cluster.protocol.is.secure=true
390a398,406
> #
>
> # For secure access by MiNiFi using client certificates
> nifi.rest.host=web-host-if.example.com
> nifi.rest.keystorePath=/opt/nifi/data/ssl/CN=minifi_OU=NIFI.p12
> nifi.rest.keystorePassword=/opt/nifi/data/ssl/CN=minifi_OU=NIFI.password
> nifi.rest.keystoreType=PKCS12
> #nifi.rest.api.user.name=
> #nifi.rest.api.password=
The following configuration fields in /opt/nifi/latest/conf/nifi.properties must
be updated:
| Configuration Option | Purpose | Required Value |
|---|---|---|
nifi.remote.input.secure |
This informs NiFi to use TLS for MiNiFi to NiFi (i.e. site to site) communication | true |
nifi.web.http.host |
If this is set, NiFi uses HTTP not HTTPS communication | none |
nifi.web.http.port |
If this is set, NiFi uses HTTP not HTTPS communication | none |
nifi.web.https.host |
If this is set, the NiFi GUI (also accessed by MiNiFi) is TLS secured | The relevant hostname to use for NiFi to be contacted by MiNiFi over. This will also be used by the reverse proxy. |
nifi.web.https.port |
If this is set, the NiFi GUI (also accessed by MiNiFi) is TLS secured | The relevant port to use for NiFi to be contacted by MiNiFi over. This will also be used by the reverse proxy. |
nifi.security.keystore |
The path to the CA certificate key to be used by NiFi. Generated by tls-toolkit.sh. The subdirectory under ssl is determined (if following this guide) by the value used for $HOSTNAME when running tls-toolkit.sh |
/opt/nifi/data/ssl/$HOSTNAME/keystore.jks |
nifi.security.truststore |
The path to the CA certificate to be used by NiFi. Generated by tls-toolkit.sh. The subdirectory under ssl is determined (if following this guide) by the value used for $HOSTNAME when running tls-toolkit.sh |
/opt/nifi/data/ssl/$HOSTNAME/truststore.jks |
nifi.security.keystoreType |
The type of file specified in nifi.security.keystore. tls-toolkit.sh generates jks files. |
jks |
nifi.security.truststoreType |
The type of file specified in nifi.security.truststore. tls-toolkit.sh generates jks files. |
jks |
nifi.security.keystorePasswd |
The password to decrypting the keystore. Generated by tls-toolkit.sh. This value is available in the /opt/nifi/data/ssl/$HOSTNAME/nifi.properties directory |
generated |
nifi.security.keyPasswd |
The password to decrypting the private CA key. Generated by tls-toolkit.sh. This value is available in the /opt/nifi/data/ssl/$HOSTNAME/nifi.properties directory |
generated |
nifi.security.truststorePasswd |
The password to decrypting the truststore. Generated by tls-toolkit.sh. This value is available in the /opt/nifi/data/ssl/$HOSTNAME/nifi.properties directory |
generated |
nifi.cluster.protocol.is.secure |
While this guide does not cover cluster installations of NiFi, for completeness change this to true. |
true |
nifi.rest.host |
The hostname that MiNiFi will be using to access NiFi. This may differ to the primary hostname NiFi uses to listen on if DNS names differ. | environment specific |
nifi.rest.keystorePath |
The path to the .p12 file that holds all the client certificates for MiNiFi services. |
/opt/nifi/data/ssl/CN=minifi_OU=NIFI.p12 |
nifi.rest.keystorePassword |
The file that holds the password to decrypt the .p12 file. |
/opt/nifi/data/ssl/CN=minifi_OU=NIFI.password |
nifi.rest.keystoreType |
The filetype holding the client certificates. tls-toolkit.sh generates a .p12 file |
PKCS12 |
Configure NiFi Authorizer Support
To allow MiNiFi to connect without a username/password, the
/opt/nifi/latest/conf/authorizers.xml needs to be configured to support
user logins with role definitions defined by the associated authorizations.xml
file. This file defines one or more security methods to be used when
secure NiFi is configured (these are ignored when using HTTP access).
Be default the following are configured:
file-user-group-providerwhich defines users in ausers.xmlfile.file-access-policy-providerwhich defines granular roles in anauthorisations.xmlfile to grant users.single-user-authorizerwhich defines the default admin user (which can log into the GUI) and whose password is configured using/opt/nifi/latest/bin/nifi.sh set-single-user-credentials.
By default users.xml and authorisations.xml are not themselves created or configured.
To automatically generate them, edit authorizers.xml:
Locate the block:
    <!--
    <authorizer>
        <identifier>file-provider</identifier>
        <class>org.apache.nifi.authorization.FileAuthorizer</class>
        <property name="Authorizations File">./conf/authorizations.xml</property>
        <property name="Users File">./conf/users.xml</property>
        <property name="Initial Admin Identity"></property>
        <property name="Legacy Authorized Users File"></property>

        <property name="Node Identity 1"></property>
    </authorizer>
    -->
This section should be uncommented, and Initial Admin Identity configured to identify the CN and OU configured e.g.:
    <authorizer>
        <identifier>file-provider</identifier>
        <class>org.apache.nifi.authorization.FileAuthorizer</class>
        <property name="Authorizations File">./conf/authorizations.xml</property>
        <property name="Users File">./conf/users.xml</property>
        <property name="Initial Admin Identity">CN=minifi, OU=NIFI</property>
        <property name="Legacy Authorized Users File"></property>
        <property name="Node Identity 1"></property>
    </authorizer>
Restart NiFi, and the resulting filesusers.xml and authorizations.xml will be automatically created. The authorizer block can now be commented out again.
The users.xml file contains the following content e.g.:
<?xml version="1.0" encoding="UTF-8" standalone="yes"?>
<tenants>
    <groups/>
    <users>
        <user identifier="8e3c6b0e-c415-3bf3-87ff-e98c2de5ea5b" identity="CN=minifi, OU=NIFI"/>
    </users>
</tenants>
The authorizations.xml file contains the following content e.g.:
<?xml version="1.0" encoding="UTF-8" standalone="yes"?>
<authorizations>
    <policies>
        <policy identifier="1f6ae57a-08bc-11eb-9242-bf69163fde10" resource="/site-to-site" action="R">
        <!-- copy the user identifier from users.xml -->
        <user identifier="8e3c6b0e-c415-3bf3-87ff-e98c2de5ea5b"/>
        </policy>
        <policy identifier="282818e0-08bc-11eb-8508-2b51c9d70d42" resource="/site-to-site" action="W">
        <user identifier="8e3c6b0e-c415-3bf3-87ff-e98c2de5ea5b"/>
        </policy>

        <!-- copy the port identifier from Remote Process Groups/Input Ports/id in the minifi config.yml -->
        <policy identifier="f512f796-7afb-4c9f-ab68-b5eaf6d5d0cf" resource="/data-transfer/input-ports/c171f9da-689f-41e2-98c4-9d785c59c306" action="R">
        <user identifier="8e3c6b0e-c415-3bf3-87ff-e98c2de5ea5b"/>
        </policy>
        <policy identifier="b4e836ee-d526-4e16-8bf3-ee1d8fa3d5e6" resource="/data-transfer/input-ports/c171f9da-689f-41e2-98c4-9d785c59c306" action="W">
        <user identifier="8e3c6b0e-c415-3bf3-87ff-e98c2de5ea5b"/>
        </policy>
    </policies>
</authorizations>
Note the user identifier 8e3... in this example matches the
users.xml file, and the c171f9da-689f-41e2-98c4-9d785c59c306 in the
input-ports url matches the UUID of the input port in your NiFi’s installation.
Restart NiFi
Once reconfigured with the TLS configuration, restart NiFi:
systemctl restart nifi
Remember: update all MiNiFi configuration as previously described and restart all MiNiFi instances as well.
Test MiNiFi Connectivity
On the service nodes, verify that a request to NiFi succeeds using the client certificates previously generated and installed:
curl -k --key /opt/minifi/conf/ssl/nifi-rest.key --cert /opt/minifi/conf/ssl/nifi-rest.crt https://web-host-if.example.com:8443/nifi-api/site-to-site
Alter the hostname as required. A request with the certificate should respond with a JSON file that describes the site-to-site configuration for the NiFi instance.
Further verify that without the client certificate, the request fails:
curl https://web-host-if.example.com:8443/nifi-api/site-to-site
A request without a certificate should response with Unauthorized.
Reconfigure the Apache HTTPD Reverse Proxy
The default installation of the HTTP reverse proxy for NiFi is to connect to NiFi on port 8080 with HTTPS. For secure communications, this changes to HTTPS. As NiFi does not allow both HTTPS and HTTP configured at the same time, the reverse proxy must use HTTPS when communicating between Apache httpd and NiFi.
To correctly enable HTTPS, reconfigure the reverse proxy file /etc/httpd/conf.d/nifi.conf to enable
the HTTPS configuration. Using the default config as a guide, the following configuration would be required:
RequestHeader set X-Forwarded-Proto "https"
RequestHeader set X-Forwarded-Port "443"
RequestHeader set X-ProxyHost "web-host-if.example.com"
RequestHeader set X-ProxyPort "443"
RequestHeader set X-ProxyScheme "https"
SSLProxyCheckPeerCN off
SSLProxyCheckPeerName off
SSLProxyEngine on
SSLProxyVerify none
<LocationMatch "^/nifi(.*)$">
    ProxyPassMatch "https://127.0.0.1:8443/nifi$1"
</LocationMatch>
Note that the X-ProxyHost and ProxyPassMatch both must use the hostname
configured in nifi.properties as the nifi.web.https.host configuration
value. The ProxyPassMatch must also be configured to match nifi.web.https.port.
Once reconfigured, restart apache using service httpd restart.
Note that this configuration does not hold a client certificate for NiFi,
and so the following error will occur in the apache /var/log/httpd/ssl_error_log file
when the GUI is being used by a user:
AH02268: Proxy client certificate callback: (<host>:443) downstream server wanted client certificate but none are configured
This error can be removed by creating and configuring a client certificate specifically for the HTTP reverse proxy. The general steps to do this are:
- Create a client certificate using the CA used by NiFi.
- Define a different DN to the one used by MiNiFi
- Load the client certificate into the client certificate p12 file used by NiFi
- Configure the apache directives
SSLProxyCACertificateFileandSSLProxyMachineCertificateFile
However detailed steps for this configuration are out of scope of this installation guide.
RAW vs HTTP Data Transfer
NiFi offers two different options for data transfer between MiNiFi and NiFi:
-
RAW transfer uses a non-HTTP based protocol which may be TLS encrypted. When using
RAWdata transfer, the ACD NiFi installation requires three ports open:- A RAW data transfer port (e.g.
1026) for transfer of the datafiles. - A HTTP(S) port for the web interface for NiFi. This web interface is used by MiNiFi and also for web-access by users (via the reverse proxy). If NiFi is to be installed only in a HTTP (insecure) mode, then this port can be fully proxied via apache HTTP. However HTTPS cannot be proxied for MiNiFi, and the NiFi HTTPS port must be directly accessible to MiNiFi.
- The HTTP(S) reverse proxy port (i.e.
80or443) to proxy web requests through to Superset and NiFi for user access via web browsers.
- A RAW data transfer port (e.g.
-
HTTP transfer uses HTTP for both data transfer and HTTP requests. When using
HTTPdata transfer, the ACD NiFi installation requires only two ports open:- A HTTP(S) port for the web interface for NiFi. This interface is used by MiNiFi and also for web-access by users. If NiFi is to be installed only in a HTTP (insecure) mode, then this port can be proxied via the reverse proxy. However HTTPS cannot be proxied for MiNiFi, and the NiFi HTTPS port must be directly accessible to MiNiFi.
- The HTTP(S) reverse proxy port (i.e.
80or443) to proxy web requests through to Superset and NiFi for user access via web browsers.
It is possible, if HTTP is being used, to use only one port for all data traffic, with NiFi completely proxied behind Apache httpd. However in this configuration all transfer is insecure over HTTP and not HTTPS.
If using only insecure HTTP the “HTTP proxy” configuration of the remote process groups NiFi can be configured to support all access via the reverse proxy, and NiFi listens on an insecure HTTP port - e.g. port 8080.
Note that the default installation of the n2nifi-wrapper package is
configured to use HTTP in this manner. It is recommended once this
configuration is completely configured as working for HTTPS to be enabled as
described in the previous section.
To enable RAW data transfer regardless of NiFi’s HTTPS secure configuration,
follow these steps:
- Set the configuration option
nifi.remote.input.socket.portin thenifi.propertiesfile to the desired value (e.g. 1026). The default configuration enables this port. - Add the port to the firewall rules to allow traffic from MiNiFi instances on the service nodes to this port. The default firewall changes documented above allow this access.
- Configure Remote Process Groups in the NiFi GUI configuration to use
RAWrather thanHTTPtransport.