Using the Flow Designer
Introduction
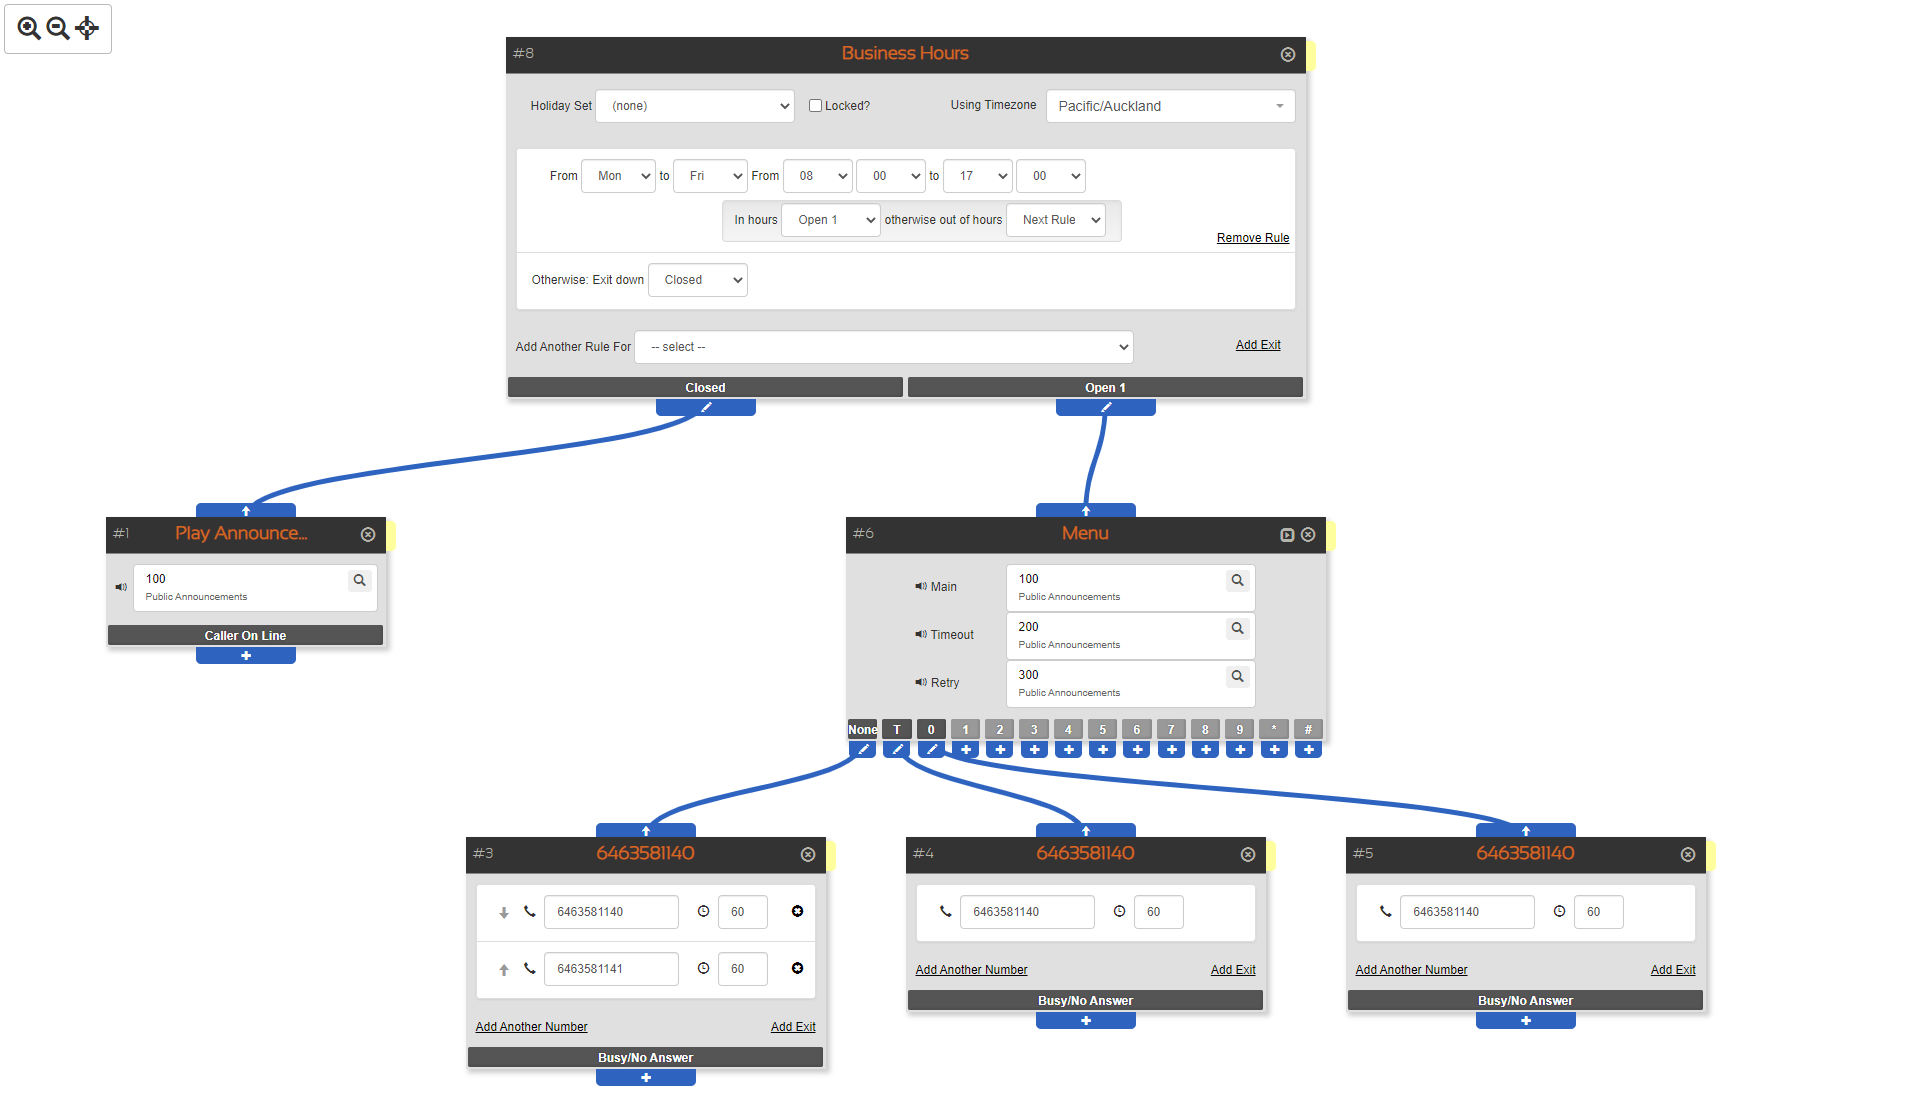
The flow designer is a graphical interface for designing control flows for service numbers. The entire control flow creation takes place on a single canvas which provides all the necessary flow and node editing features directly on the canvas.
When beginning a new flow, the flow will present a Start node. This node may disappear once the first node is selected (depending on global configuration selected by the system operator).
One of the features of this flow editor is that it presents flows as a non-looping tree of nodes , and the first node (the starting point for a control flow) is always the node without any lines going into the top of it.
Note that loops are supported using the Link node, however these do not draw a line from the Link node across or up the tree, hence visually there are no loops shown.
Moving Around
To move around a flow, click and drag the canvas by clicking on any part of the white background where the flow appears, and (while holding the mouse button down), drag the mouse in the direction you want the flow flow to move.
You can also centre a node in the canvas by clicking on the node’s titlebar. The titlebar is the area of the node which displays the node’s name and node number.
You may follow a branch of a node by clicking on the node exit. The node exits are shown at the bottom of each node, with a node exit name (exit names depend on the node type and are often context specific).
When clicking a node exit, the node that the exit is linked to (if any) will be centred in the flow canvas.
You may move up the flow by clicking the button that appears above each node. This link will recenter the flow on the node that links to the focused node, allowing movement back up the tree.
Flow Versions
When viewing a flow in the flow designer you may also change the version of the control flow you are viewing
by selecting the change button located next to the flow version in the titlebar of the flow designer.
The Flow Version option allows you to select the version of the control flow to view or edit:

All versions of a control flow are displayed unless they have a build status. Versions with errors
will be displayed in the list with an error tag.
Zoom Levels
The flow designer supports three distinct levels of zoom.
- In-line editing. All node configuration is shown in-line within the flow itself. This is the highest zoom level.
- Node icons. All nodes are shown as smaller icons, and the overall flow layout is compressed to display more data within the same screen. Node configuration is shown within a separate properties window, with only the currently selected node shown.
- Fully zoomed-out. Nodes are shown as simple dots, and node editing is not possible.
In the top left corner of the flow designer a set of controls are provided to aid in the changing of the zoom levels as well as re-centering the current flow view.

In-Line Editing View
The default zoom level is the standard in node editing mode.
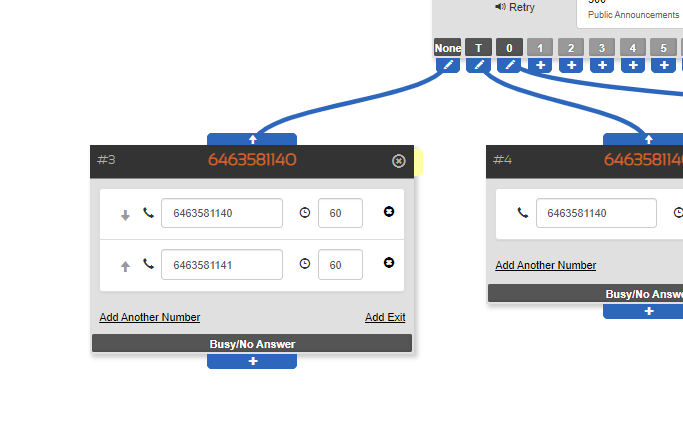
In this view node configuration is edited inline.
Simplified Nodes
The simplified node view is shown in two situations:
- The user has clicked the
-magnifying glass icon to zoom out from the fully zoomed node view. - The flow has more than 100 nodes.
In this mode nodes will be displayed as simply as possible, for both performance and best usability.
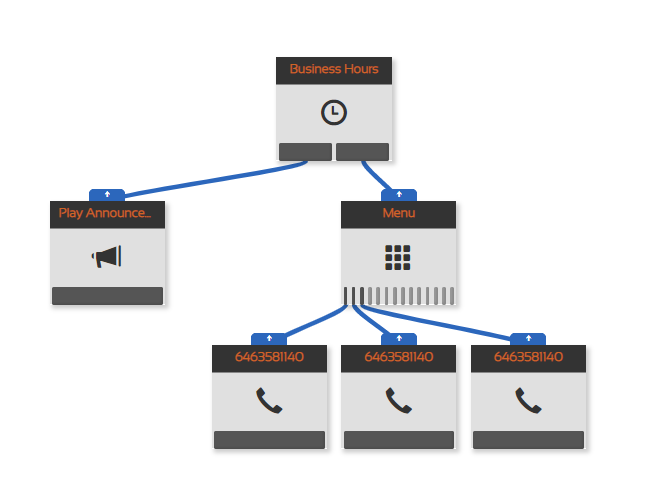
In this view clicking a node will select it and open the node properties panel for editing.
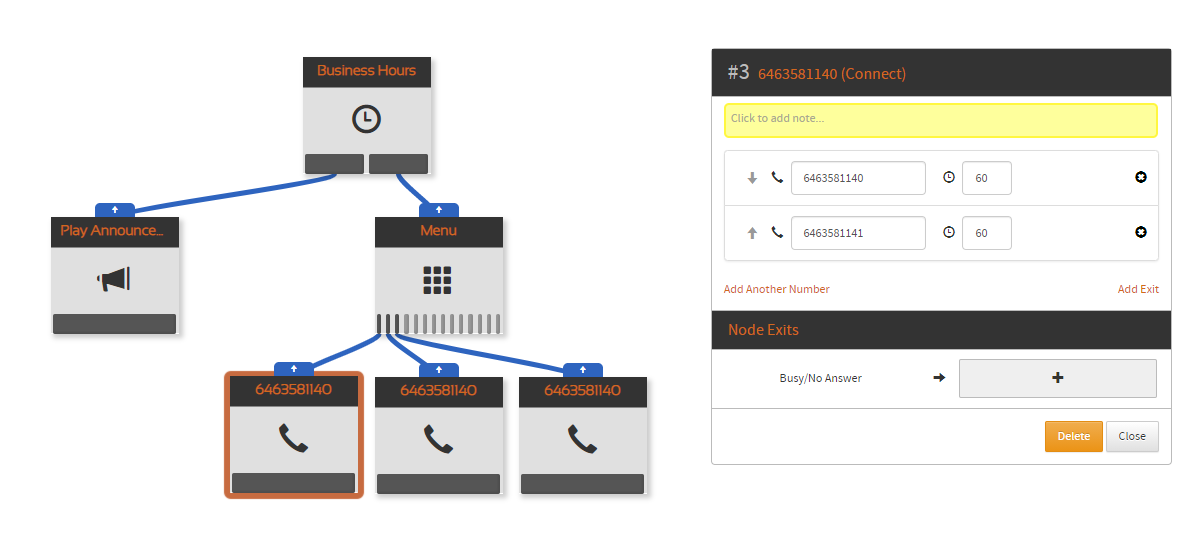
Textual Graph View
At the lowest zoom level, a tree diagram is displayed, with the starting point for the flow on the far left:
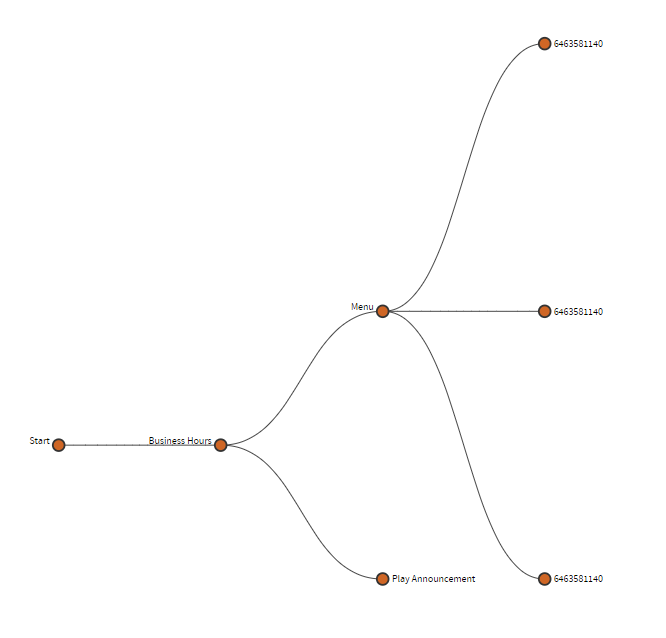
In this view clicking the name of a node will take the user back to the normal flow view, and focus on the selected node.
Saving Flows
A node may be saved using the save flow link in the titlebar of the flow designer.
When saving, the server performs validation checks on the flow configuration. If any issues
arise from the validation, these are presented on screen for resolution.
When saving, you may choose to save the flow with a new name, or (if relevant), keep the existing name.
Flow names cannot end with the reserved suffix _emergency. This suffix is used to indicate the flow is an alternative flow for emergency use.
If an alternative flow is being created you will be unable to adjust the name of the flow.
Flow Validation
A flow may be in a state where it may not be saved due to missing or invalid configuration. For example, a Connect node requires a phone number to be input for each connect box in the node.
When attempting to save a flow, the user interface will perform local validation on the flow, ensuring that all basic validation requires pass. If any of these requirements fail, the flow validation list will be displayed in the bottom-right of the screen:
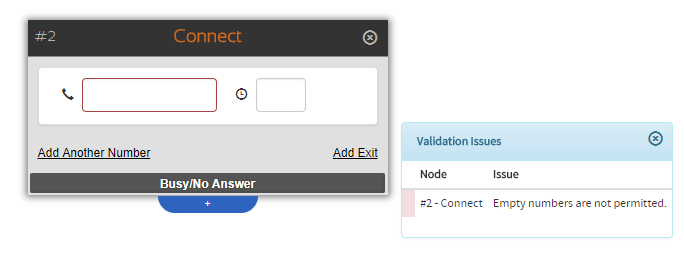
If one or more validation errors are displayed, before attempting to save the flow again work through each validation error displayed and resolve it. The resolution will depend on the error, and if the fix is not clear, consult the node’s documentation for further information on what may be required.
To navigate to the node with the validation error, click the validation failure text, and the node in question will be centered in the display.